
This tutorial shows how to create a water effect using aluminum foil. I use this method for a few reasons including low price of materials involved, ease of use, and scalability. This last aspect is something that I think differentiates this method from others consisting of pre-established "waves" such as pieces of textured plastic. With those methods, the builder is locked into a certain type of wave height and choppiness depending on the piece of plastic. With aluminum foil, the builder can vary his wave height and choppiness with a few simple crumples of the foil and manipulation with the back of a finger nail. Let’s take a look:

Aluminum Foil-- found in rolls in any supermarket
A Base-- this can be anything from a stained piece of wood to a piece of plastic
Primer-- Tamiya spray primer works fine; if you have some metal primer, that's fine too
Putty-- to fix small mistakes if the foil tears
Base Color-- this can be a spray can of any color that will make a suitable base for your water. Darker blues for deep ocean, lighter for shallow, etc.
Offset Color-- this color is usually in a brush paint format; acrylics such as Vallejo and Reaper work well because you'll want to be able to apply the paint in washes and water based paints do this easily. The color is generally lighter than the base color and works in conjunction such as a greenish blue, etc.
White Paint-- another brush paint as this will be dry
brushed.
White Glue-- basic glue like Elmer's, etc.
White Glue-- basic glue like Elmer's, etc.

Unroll the aluminum foil and lay your base down on it. Cut out a piece of foil slightly larger than your base.

Set the base aside. At this point, decide how choppy your water will be. If it's a fairly serene scene, you may not have to do anything with the foil as the small crumple already in it may be enough. However, if you want choppier water, roll up the foil into a loose ball.
Be sure not to roll it up too tight as it may become hard to unroll without tearing the aluminum. Just keep rolling up and unrolling the aluminum until you have the amount of chop you want.

Decide what kind of water coverage you want on your base. If you want the water to go right up to the edge of the base, fold the foil's edge inward to match the dimensions of the base (laying the base on top of the foil can help you start the line to fold).


If you decide you want some of the base to be seen as a border, fold in the edges more until you have the amount of base visible that you want.

Make sure your base has a little bit of texture for the glue to have something to grab. Most wood bases will be fine, even if they're varnished. However, something like plastic may have to be "roughed up" a little with sand paper at first. When your base is prepared, spread white glue over the surface.

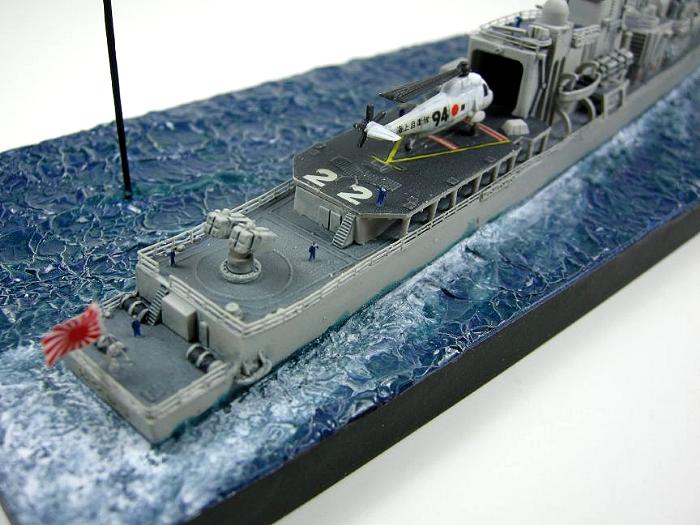
Lay the foil down on the base and while the glue is still soft and malleable underneath, place your hull where you want it to go. Press down very hard on the hull so that it leaves an imprint in the foil. This is why you didn't want to have the model done before this as there's the risk of breaking something. The reason for pressing the hull into the foil for the imprint is because ships don't ride above the water at their waterline point. If there's any chop in the water, it will raise slightly above the waterline-- so you want your hull to be slightly lower than the surrounding foil waves (more if your water is very ferocious).

With the indentation from the hull as a guide, use the back of your fingernail (or any small burnishing tool), to press down the area of the foil that the hull covers. You don't want it to be perfectly smooth, as the foil texture gives something for the glue to grab to, but enough for the hull to "sink" into. Also, use this opportunity to study your research as to what kind of wake pattern your ship causes. Then, use the back of your fingernail to "sketch" this pattern into your water. Depending on your water conditions, the water ahead of the ship may be rougher or calmer than what the ship leaves behind.


At this point, you can still modify your overall chop a little, by pressing down on various areas of the foil to "calm" the waters... Also be sure the corners of your foil are glued down nice and solid-- if not, you can put some white glue on a toothpick and slide it under the edges of the foil to help make them secure.
-
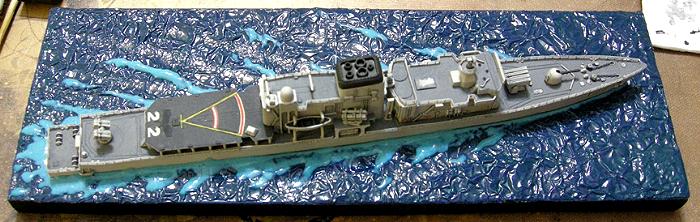
Mask the parts of your base that you don't want painted with tape. Spray primer on the foil (the following image depicts the base turned around to better catch the light for the photo of the waves).

The primer has revealed some small tears in the foil.

These tears can be fixed easily with some small dabs of putty. Because water is chaotic, the putty doesn't have to be smoothed as it will blend in with the water when done. If the putty isn't the same color as the primer (as Tamiya putty is with Tamiya primer), make sure to spray a small shot of primer onto the putty.

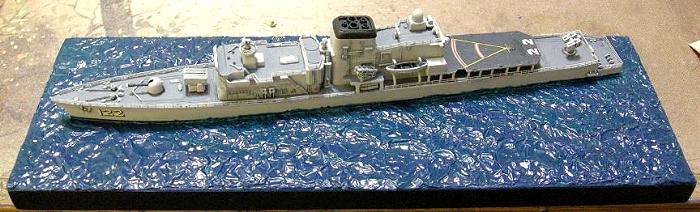
It's now time to put on the base color. This doesn't have to be perfect and usually can be sprayed from a can, as long as the paint dries smooth. This base color is Testors Model Master Blue Angel Blue spray.

Now it's time to get the offset color. For many of my bases, I use Reaper Deep Ocean water based acrylic. Water down some drops of the paint and apply to the foil in patches.

After this wash of the offset color, dry brush some of the same color (uncut) into areas where the water is higher and not as deep, such as the wake and bow waves.


If the water has a matte appearance that you don't like, put on some gloss varnish at this point.
-
After the offset color dries, pour out some white glue onto a scrap piece of paper. It should be enough to cover the bottom of the ship's hull with some left over. Add a few drops of the offset color to the glue.

It's okay that the mixture looks light. It's because the white glue's color. However, when the white glue dries clear, the offset color will be true. The reason for using this mixture instead of the usual colored gel idea will be explained in an upcoming step.
-
Apply the mixture to the bottom of the hull. Place the ship onto the base and press down so that some of the mixture oozes out. Use a toothpick to guide the mixture alongside the hull. Use the leftover mixture to add some more height to the high points of the ship's wake. After the mixture dries, this will all blend in nicely.
Note: If your hull is heavy and you have had to use pins to help secure it to the base, use some epoxy in the pin areas, but the glue mixture everywhere else.
The mixture has dried...
The mixture has dried...

-
et the white paint and a short stiff brush. I use Vallejo white and an old brush (image also shows the Deep Ocean paint used as the offset color).

The white is used in two ways: 1.) to create foam on the wake and churned water, and 2.) to add highlights to the wave crests.
Very lightly dry brush the entire surface to help bring out the wave pattern.
Very lightly dry brush the entire surface to help bring out the wave pattern.


Add more dry brush layers where the water is churned up more or is choppy-- areas such as the wake and aft of the ship. You'll notice that this works in conjunction with the previous offset color.

It's okay to have the white hit the sides of the hull as it adds to the foam effect. This is also why this method utilizes the glue/paint mixture instead of something like pre-colored gel. More depth is achieved by building up the foam around the ship instead of being stuck with just one solid white gel color surrounding the entire ship.


If you end up making a mistake and adding in a little too much white, simply dry brush some of the offset color over the area and blend the white back down, or even make it disappear and start over.
About Dade W. Bell (Karybdis)
FROM: FLORIDA, UNITED STATES
FROM: FLORIDA, UNITED STATES

Brak komentarzy:
Prześlij komentarz